Add some spice and life to your home with a gold lampshade!
I’ve seen plenty of those lampshades with gold lining but I was thinking… why not take it to another level? Why does the gold have to be subtle and so hidden?
Let’s gild the whole lampshade and let it stand out and be its own moment in your home. Creating fun and quirky home decor is what I love doing most so this post is a quick and easy tutorial for gilding your own lampshade.
How to Gold Leaf a Lampshade
Supplies you need for this lampshade DIY project:
- Old Lampshade can be any fabric or material
- PVA glue
- Brushes for the glue and a soft dry brush for the metal leaf
- Metal size/adhesive
- Clear Varnish or lacquer
- Metal leaf, you don’t need the real gold sheets as imitation gold work so well, has the stunning shine like real gold and also comes in plenty of colours
- New trim and tassel trim if desired
- Fabric glue or hot glue for trim
Step 1: Get your old lampshade
Step one of this tutorial is of course choosing a suitable lampshade for this upcycling project. I had one lying around that I man managed to grab for free from a boot fair and I didn’t think about the material too much.
Your choice can be more specific to your needs. Perhaps you want a particular shape or style shade for your lamp. You might have a spare lying around too!
Step 3 (as you’ll find out) helps to create a solid and less absorbent surface for you to gild. As a result, you can pick any fabric type so that you can focus on upcycling the most beautiful lampshade you want. Allowing you to choose a ceiling shade, a plastic shade, or a vintage huge shade if you wanted.

Step 2: Remove old trim, clean, and repair
Unfortunately, some lampshades might not be in the best shape and need a little bit of love before the best part starts.
First, begin by removing the old trim. I used scissors to cut between a small part of the trim and the shade material and cut through the trim. Ripping it off was a lot of fun but it did reveal how dusty it was.
This step is all about preparing the lampshade to be a blank slate. After removing the trim, give it a clean with warm soapy water and repair any holes.
You can patch holes using fabric or darning with thread. You can see from my image, there was a small hole which I patched with kitchen roll and PVA in the next step.

Step 3: Coat the whole shade in PVA
To gold leaf a lampshade properly, you want to ensure the surface is properly prepared. Fabric likes to soak up liquids and what can happen is that the adhesive soaks in and dries too quickly. Leaving you with a patchy and a not-so-nice gilded lampshade.
Therefore, to prepare the lampshade for this DIY you want to coat it with PVA. Two coats of PVA work well to solidify the fabric and create a barrier between the material and the metal adhesive you’ll be using.
Ensure that each coat is fully dry before recoating or moving on to step 4.

Step 4: Apply 1 even coat of adhesive
Metal leaf needs a special adhesive to work correctly. Without metal leaf adhesive, also known as size, you won’t be able to gold leaf a lampshade properly.
Other rather adhesives like PVA or spray adhesive do not have the same tacky properties needed to adhere to the metal leaf. I recommend Polyvine size as a trustworthy brand from the UK. You can usually buy this product from stockists all over. However, any size will work as long as it specifies use with metal leaf.
Once you have your size ready, apply one even coat all over the lampshade. You want to do this once, without missing any parts, as patching or doing one side at a time can ruin the metal leaf.

Quick tip: mix some size with a drop of food colouring so you can see where the size is applied easier. It comes out white but dries clear making it difficult to find any missed parts.
Step 5: Wait
The anticipation might kill you but you have to wait for the adhesive to begin drying. As I mentioned, metal size has a tacky property that is essential for gilding.
The size only gets tacky after at least 20 minutes and can stay tacky for hours. If you apply your gold leaf too soon, the wet size can make it slide about and it will be more difficult to apply.
Step 6: Apply the gold leaf to the lampshade
Get your stack of metal leaf sheets at the ready. Pick up one sheet at a time. I prefer to pick the metal leaf with the separating paper as it can really move about and stick to your hands. Try and lay the sheets as flat as possible and overlap the edges so no parts are missing.
The tackiness of the adhesive immediately grabs the metal leaf so you know it will properly adhere. However, you want to ensure that you don’t accidentally brush the adhesive with the sheets as it will stick somewhere you didn’t want it.
Don’t get your knickers in a twist over wrinkles because when removing the excess, these will disappear. 🙂

After you’ve applied all the gold leaf, use a dry brush to gently, VERY gently, fix the sheets to the lampshade. This helps to ensure there are no gaps or bubbles before you leave it to dry.

Step 6: Leave the gold leaf lampshade to dry
Another test of your patience is waiting for the gold leaf layer to dry. I recommend at least a few hours for it to dry and waiting overnight is even better. You do not want any of the metal leaf that you carefully applied to be ripped off because it’s not completely dry and ruining your hard work. Waiting will ensure that you have the best result with this DIY gold leaf lampshade project.
Step 7: Use a dry brush to remove excess
Using a soft, dry brush you can begin dusting off the excess metal leaf. You don’t have to be too delicate here, you want to ensure that all loose parts are removed.
This step gets particularly messy and the gold dust flies around in the air. After brushing the excess, I recommend using a hoover to suck up the gold leaf and using a brush attachment to go over the lampshade again with the hoover.
If you’re still having problems with loose bits hanging around, use a damp piece of kitchen roll. Gently wipe the gold leaf lampshade, folding the towel between each wipe so the dust stays on the kitchen roll.

Step 8: Coat with lacquer
Over time, the metal leaf can tarnish and discolour. If you want to keep the shiny finish, you can apply a clear lacquer. I recommend Polyvine clear lacquer but any varnish or acrylic clear coat would be suitable.
Now you can see your gold leaf lampshade as a whole. This is when you get to decide on any embellishments and trims you want to add to the lampshade.

I loved my DIY gold leaf lampshade in the simple gold, however, the edges weren’t as perfect as I’d like. So, I decided to add trim and tassels in the same way that I originally had the shade.
Step 9: Glue on your embellishments
Arm yourself with either fabric glue or a hot glue gun and your trim for this step. Glue the first part and slowly working your way around the edge of the lampshade. Glue and hold the trim in place for a few moments till it adheres.
Make sure that the trim is always flat, has no knots or twists, and sticks in the right place.
The scallop edge of my lampshade was tricky to work with and the tassel trim was hard to keep straight. So I added a gold, sparkle trim over for even more wow factor.

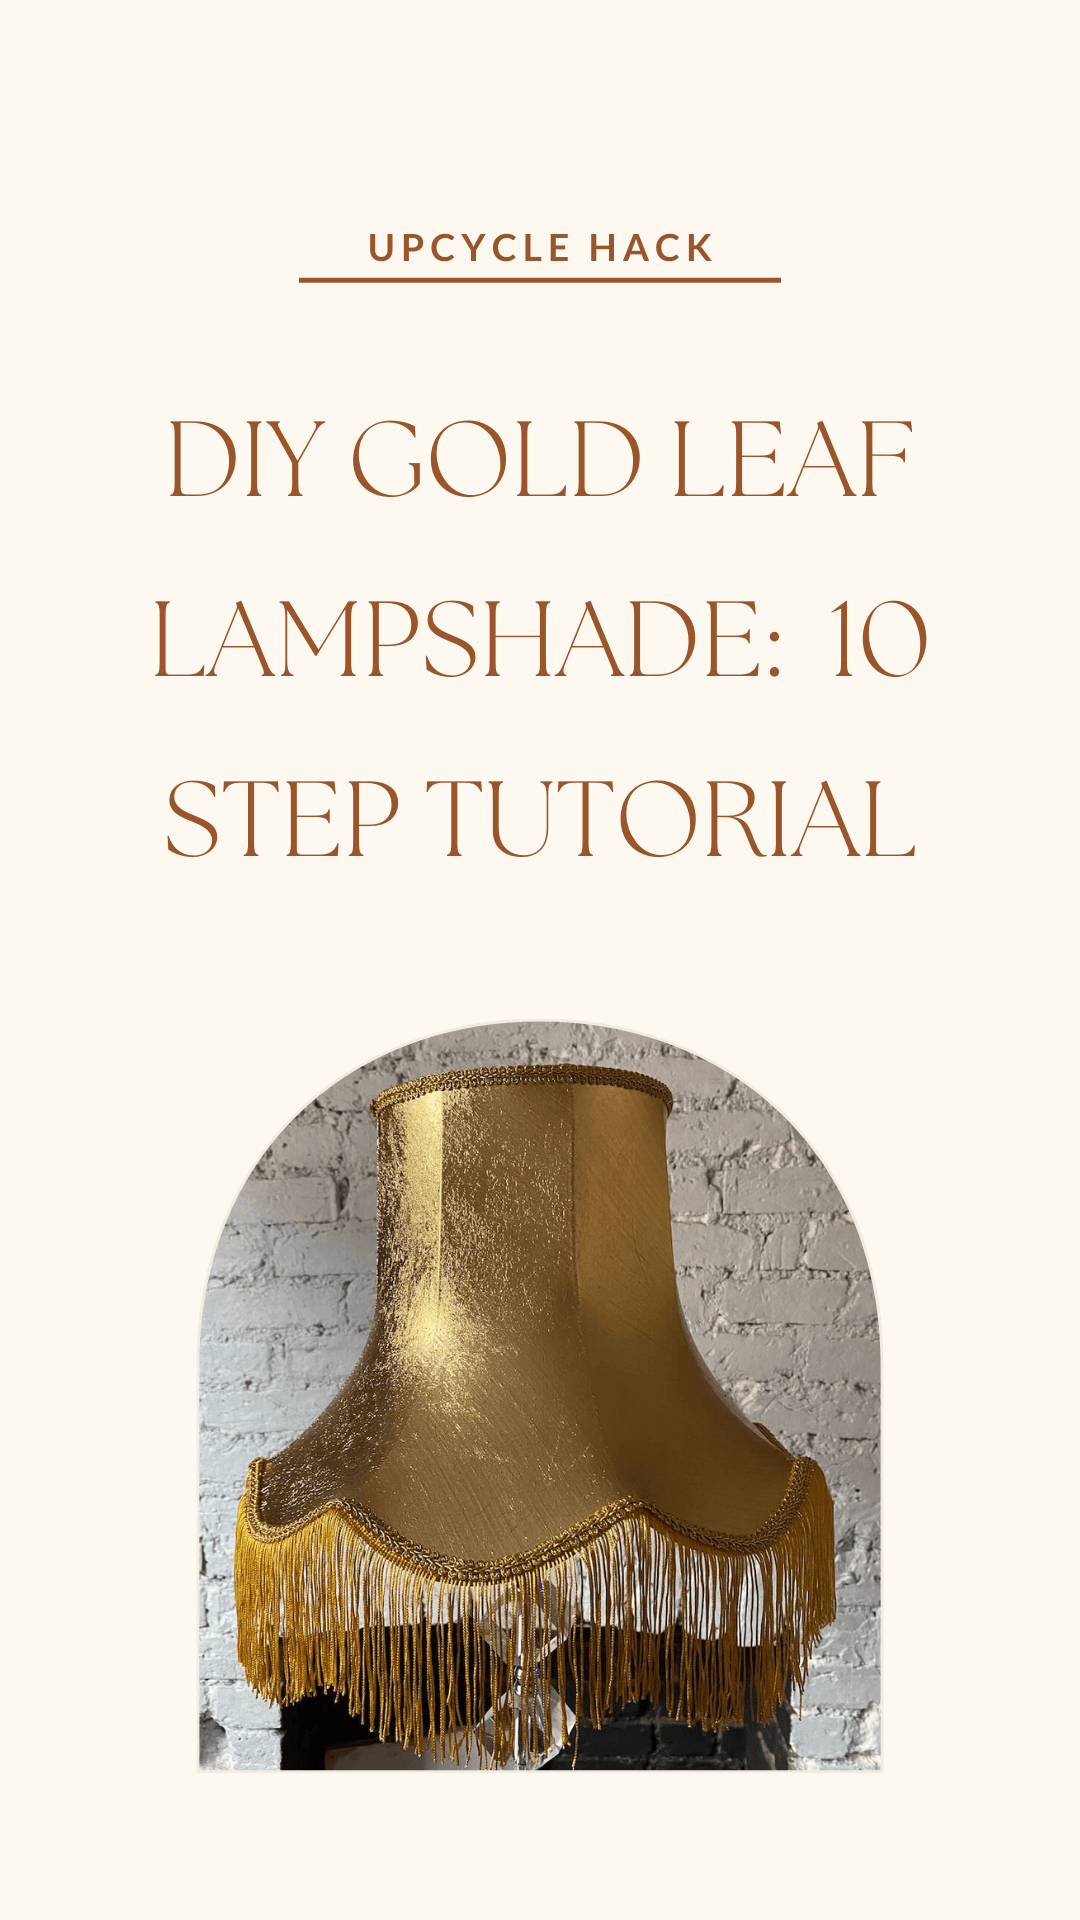
Step 10: Enjoy your new gold leaf lampshade!
Now all that’s left is to add your upcycled lampshade to your lamp! Whether it’s on a floor lamp or a table lamp, this lampshade will make an impact in your home.


What I love about this technique is that you can still see the texture of the fabric underneath the gold leaf. Giving this DIY project a true handmade yet elegant feel.
Can you use these tips to create a gold lampshade inside? Absolutely, repeat all the steps on the inside of the lampshade to create a metallic gold lining. You can also start the project by spray painting the lampshade on the outside too.
Now it’s your turn to gold leaf a lampshade! Show me your projects in the comments
Save this for later and pin it on Pinterest!


